 Save
Save My neighbor Marion once brought these thumbprint cookies to a garden fence chat, and I watched her describe them with such genuine joy that I had to ask for the recipe right then and there. She'd learned to make them from her mother-in-law during a rainy weekend in the Cotswolds, and the way she talked about the contrast between buttery dough and cool clotted cream made them sound almost magical. When I finally baked my first batch, the kitchen filled with this warm, vanilla-scented air that made everything feel like a small celebration. It took me a few tries to get the indentations deep enough and the filling proportions just right, but once I nailed it, these became my go-to when I wanted something that felt both simple and special.
I made these for a small book club once, worried they might be too basic for the occasion, but they disappeared faster than the finger sandwiches. One guest actually sat down mid-conversation and ate three in a row, which told me everything I needed to know about whether they worked. Since then, they've become my quiet confidence builder whenever I'm hosting—something homemade and pretty that doesn't require me to be in the kitchen all day.
Ingredients
- All-purpose flour (2 cups): The foundation here, and measuring it by weight makes a real difference if you have a scale—those cups can be deceiving depending on how you scoop.
- Fine sea salt (1/4 tsp): Just enough to wake up the butter and sugar without anyone tasting salt directly; it's subtle but absolutely necessary.
- Unsalted butter (1/2 cup, softened): Cold butter won't cream properly, so take it out of the fridge 30 minutes before you start—this is where the tender crumb comes from.
- Granulated sugar (1/2 cup): This sweetness keeps the cookie gentle without being cloying, which lets the clotted cream and jam really shine.
- Large egg yolk (1): Just the yolk, not the white—this keeps things rich and binding without adding extra moisture that toughens the dough.
- Pure vanilla extract (1 tsp): Don't skip this or use imitation; the real thing carries a warmth that cheap stuff simply can't match.
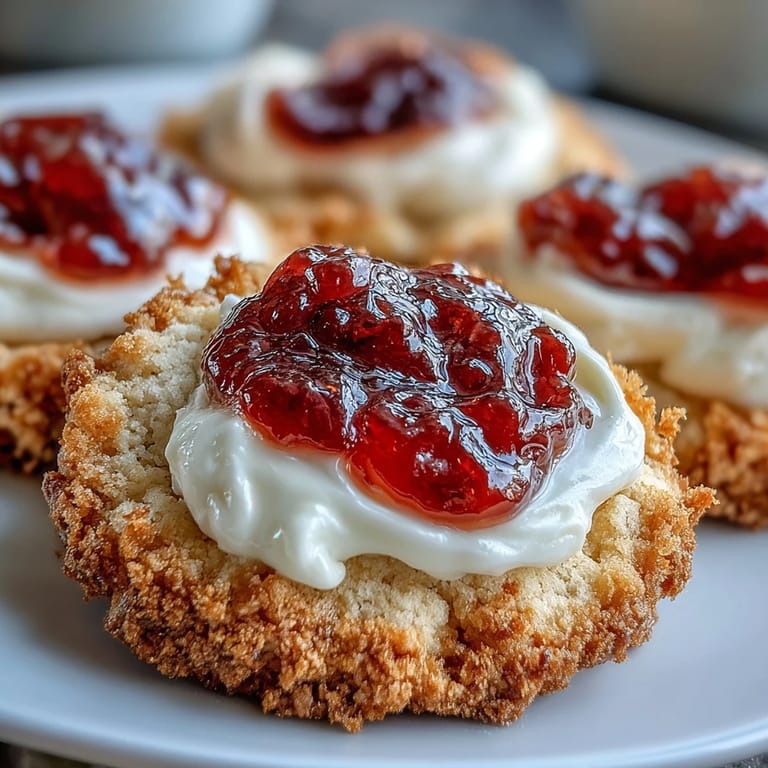
- Clotted cream (1/2 cup): This is the star of the show, and if you can't find it at a regular grocery store, look at specialty or British food sections—crème fraîche works as a substitute but won't give you that same luxurious texture.
- Strawberry jam (1/3 cup): Use jam you actually like eating straight from the jar; quality matters here since there's nowhere to hide.
Tired of Takeout? 🥡
Get 10 meals you can make faster than delivery arrives. Seriously.
One email. No spam. Unsubscribe anytime.
Instructions
- Heat your oven and prepare:
- Preheat to 350°F (175°C) and line two baking sheets with parchment paper so nothing sticks. This temperature is the sweet spot—hot enough to set the cookies gently but not so hot that the edges burn before the centers bake through.
- Mix your dry base:
- Whisk the flour and salt together in a medium bowl to distribute the salt evenly throughout. This small step prevents tiny salty pockets in your finished cookies.
- Cream butter and sugar until fluffy:
- Beat softened butter and sugar together for about 2 to 3 minutes until pale and noticeably lighter in color—this is where air gets incorporated, making cookies tender instead of dense. You should be able to run your finger through it and see a light trail.
- Add the egg and vanilla:
- Beat in the egg yolk and vanilla extract until everything is well combined and smooth. This step binds everything together and adds that subtle warmth.
- Bring the dough together gently:
- Gradually mix in the dry ingredients until you have a soft, cohesive dough that holds together but isn't overworked. You want to handle it as little as possible once the flour goes in.
- Roll and shape your cookies:
- Roll the dough into 1-inch (2.5 cm) balls and place them 2 inches apart on your prepared baking sheets. These need space to spread just a little bit.
- Make your thumbprints:
- Press your thumb or the back of a small teaspoon firmly into the center of each ball to create a deep indentation—don't be shy here, as the filling needs somewhere to nestle. Make sure the indent goes about halfway down but doesn't punch through to the bottom.
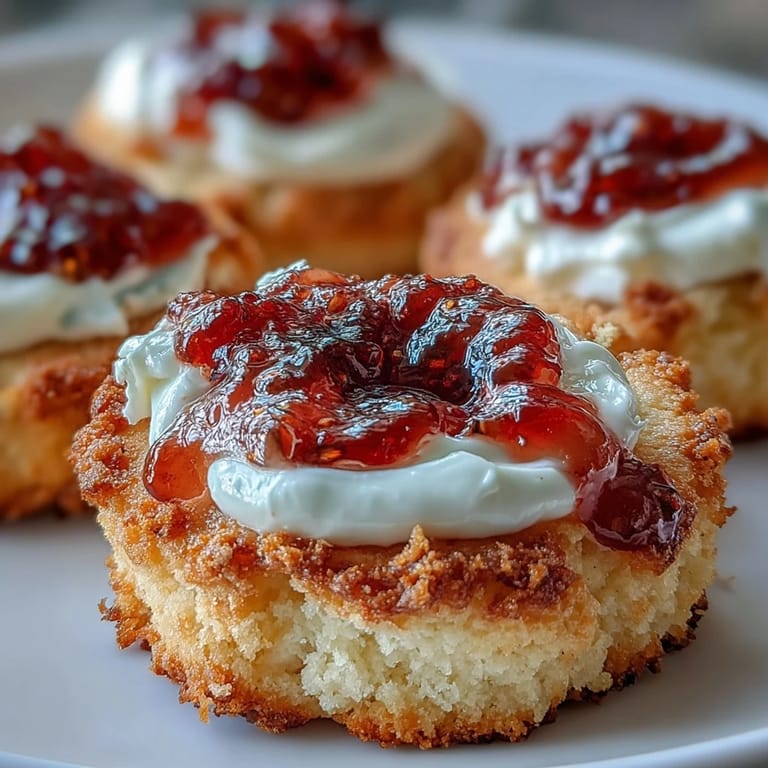
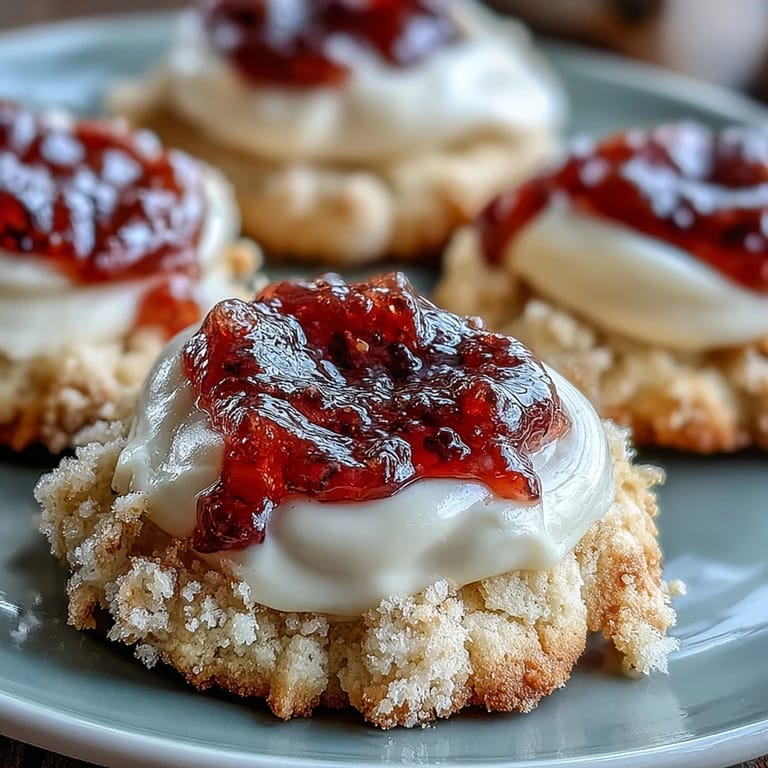
- Fill with clotted cream and jam:
- Spoon about 1/2 tsp of clotted cream into each indentation, then top with about 1/4 tsp of strawberry jam. The cream goes first because it acts as a buffer, keeping the jam from soaking directly into the warm dough.
- Bake until golden at the edges:
- Bake for 13 to 15 minutes, watching until the edges turn a light golden brown while the centers stay pale and tender. The cookies will look barely set when you pull them out, which is exactly right.
- Cool with intention:
- Let them sit on the baking sheet for 5 minutes to firm up slightly, then transfer to a wire rack to cool completely. This prevents them from crumbling when you pick them up.
 Save
Save There was this moment when I first bit into one of these warm, still slightly soft from cooling, and the clotted cream melted against my tongue while the jam added this gentle berry brightness—I realized why Marion had been so excited about them. They stopped being just cookies and became this small, deliberate pleasure, the kind of thing that makes afternoon tea feel like an event.
Why These Cookies Stand Out
What makes thumbprint cookies special is that they're humble enough to bake on a regular Tuesday but elegant enough to bring to someone's house for a celebration. The beauty is in the simplicity of the technique—no piping bags, no special tools, just your thumb and a steady hand. Every cookie ends up slightly different, which somehow feels more genuine than something machine-perfect.
Flavor Pairing and Serving Ideas
These cookies were essentially created to sit alongside a hot cup of tea, but honestly they pair beautifully with almost any warm beverage—coffee, hot chocolate, even a simple cup of hot water with lemon on a cold afternoon. The clotted cream brings a slight richness that keeps them from tasting overly sweet, so you can eat two or three without that sugar-crash feeling. They're also lovely at room temperature, which means you can bake them the day before without any guilt.
Storage and Make-Ahead Tips
Once these cookies are completely cooled, they keep beautifully in an airtight container for about four days, though I've found they taste best within the first two. If you want to bake ahead, you can make and freeze the dough balls for up to a month—just add an extra minute or two to the baking time since they go straight from freezer to oven. The clotted cream and jam filling is best added shortly before serving rather than hours ahead, as the jam can slowly soften the cookie structure over time.
- Store in an airtight container at room temperature away from direct sunlight to keep them fresh and prevent the jam from oxidizing.
- If making ahead, consider baking the unfilled cookies and storing them separately, then assembling on the day you plan to serve.
- These freeze wonderfully for up to three months once completely cooled, making them perfect for having on hand when unexpected guests arrive.
 Save
Save These little cookies have this quiet way of making people smile, whether you're dunking them in tea alone on a quiet morning or sharing them with people you love. Once you master the technique, you'll find yourself baking them again and again.
Recipe FAQs
- → Can I substitute clotted cream with other dairy products?
Yes, alternatives like crème fraîche or mascarpone work well, providing a similar creamy texture and mild tang.
- → What is the best way to make the thumbprint indentation?
Use your thumb or the back of a teaspoon to gently press a deep well in each dough ball before filling.
- → Can I use different jam flavors?
Absolutely; raspberry or apricot jam are excellent variations that complement the creamy filling.
- → How do I know when the cookies are baked perfectly?
Bake until the edges turn lightly golden, usually about 13–15 minutes, then cool before serving.
- → Are these cookies suitable for vegetarians?
Yes, this version contains no meat products and fits a vegetarian diet.