 Save
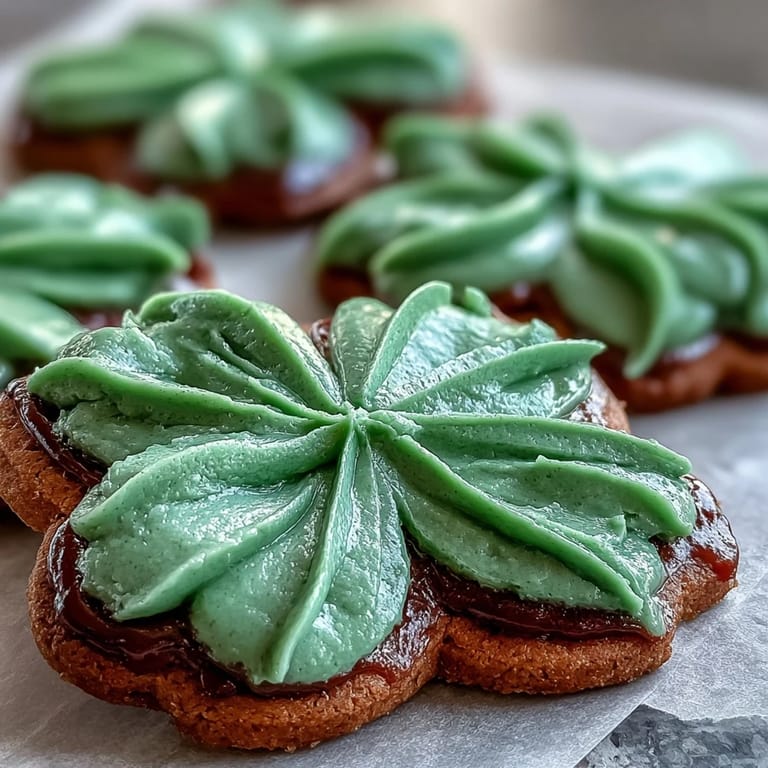
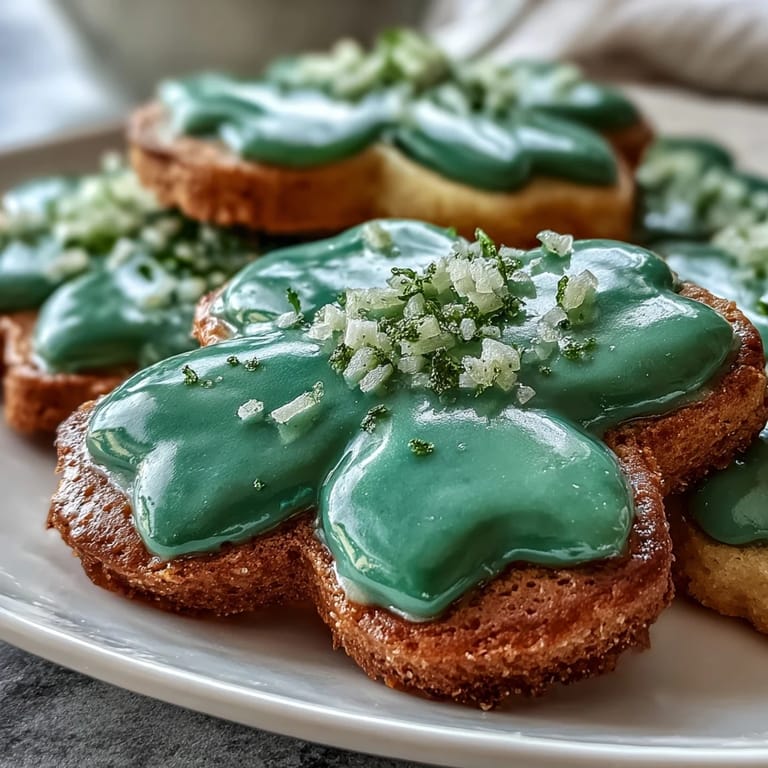
Save There's something about the week before St. Patrick's Day that makes my kitchen smell like butter and possibility. Last year, my neighbor stopped by just as I was pulling a batch of shamrock cookies from the oven, and the look on her face when she saw them cooling on the rack told me everything—these weren't just cookies, they were tiny edible celebrations. The combination of buttery dough and that glossy green icing somehow captures the spirit of the holiday better than anything else I've tried making.
I remember being overwhelmed the first time I tackled royal icing—it seemed like something only professional decorators could master. My daughter was convinced we'd messed up when the icing looked too stiff, but then it softened just enough to pipe, and suddenly we were creating perfect little shamrocks together. That afternoon shifted how I think about baking with kids; it's not about perfection, it's about the moment when they believe they can do something that seemed impossible five minutes before.
Ingredients
- All-purpose flour (2 1/2 cups): The foundation of tender cookies, so measure by spooning into your cup rather than scooping directly from the bag—this small habit prevents dense, tough cookies.
- Unsalted butter (3/4 cup), softened: Softened butter creams beautifully and creates that light, fluffy texture that makes these cookies melt in your mouth.
- Granulated sugar (1 cup): This is what gives the cookies their sweetness and structure; creaming it with butter is the secret to cookies that stay tender even after days of storage.
- Large egg (1): This binds everything together and adds moisture—make sure it's at room temperature so it blends seamlessly into the dough.
- Vanilla extract (2 teaspoons): Use pure vanilla, not imitation, because it makes a noticeable difference in the final taste.
- Almond extract (1/2 teaspoon, optional): If you include this, it adds a sophisticated undertone that makes people ask what secret ingredient you used; feel free to leave it out for nut allergies.
- Powdered sugar (3 cups), sifted: Sifting removes lumps and ensures your royal icing flows smoothly without streaks or graininess.
- Egg whites (2 large): These create that glossy, smooth icing; alternatively, use meringue powder if you prefer to skip raw eggs.
- Green gel food coloring: Gel coloring gives you a vibrant green without thinning out your icing the way liquid coloring would.
Tired of Takeout? 🥡
Get 10 meals you can make faster than delivery arrives. Seriously.
One email. No spam. Unsubscribe anytime.
Instructions
- Mix your dry ingredients:
- Whisk together flour, baking powder, and salt in a medium bowl and set it aside. This step prevents lumps and makes sure the leavening is evenly distributed throughout your dough.
- Cream butter and sugar:
- Beat softened butter and granulated sugar together for about 2 to 3 minutes until the mixture looks pale and fluffy, like clouds. This is where the magic happens—you're incorporating air that makes cookies light instead of dense.
- Add your wet ingredients:
- Mix in the egg, vanilla extract, and almond extract (if using) until everything is smooth and combined. Don't skip on the mixing here; you want these ingredients fully incorporated so the flavors spread evenly through the dough.
- Bring it together:
- Gradually add your dry ingredients to the wet mixture, stirring just until you no longer see streaks of flour. Overmixing at this stage can make cookies tough, so stop as soon as everything is combined.
- Chill the dough:
- Divide the dough in half, shape each piece into a disk, wrap it in plastic wrap, and refrigerate for at least 1 hour. This resting period makes the dough easier to roll and helps the cookies hold their shamrock shape during baking.
- Get your oven ready:
- Preheat to 350°F (175°C) and line your baking sheets with parchment paper. Parchment prevents sticking and ensures even browning on the bottoms of your cookies.
- Roll and cut:
- On a lightly floured surface, roll the dough to about 1/4-inch thickness and cut out shamrock shapes with your cookie cutter. If the dough becomes too warm and sticky while you're working, pop it back in the fridge for a few minutes.
- Bake until golden:
- Place cookies on your prepared baking sheets and bake for 9 to 11 minutes, watching until the edges just begin to turn golden. Let them cool on the baking sheet for 5 minutes so they firm up, then transfer to a wire rack to cool completely before decorating.
- Make the royal icing:
- Beat powdered sugar with egg whites (or meringue powder mixed with water) and vanilla or lemon juice until stiff peaks form and the icing is glossy and smooth, about 5 minutes. The icing should be thick enough to hold its shape but still pipeable.
- Color your icing:
- Divide the icing into bowls and tint each portion with green gel food coloring to whatever shade of green makes you happy. Start with a small amount of coloring and add more until you reach your desired hue.
- Decorate with confidence:
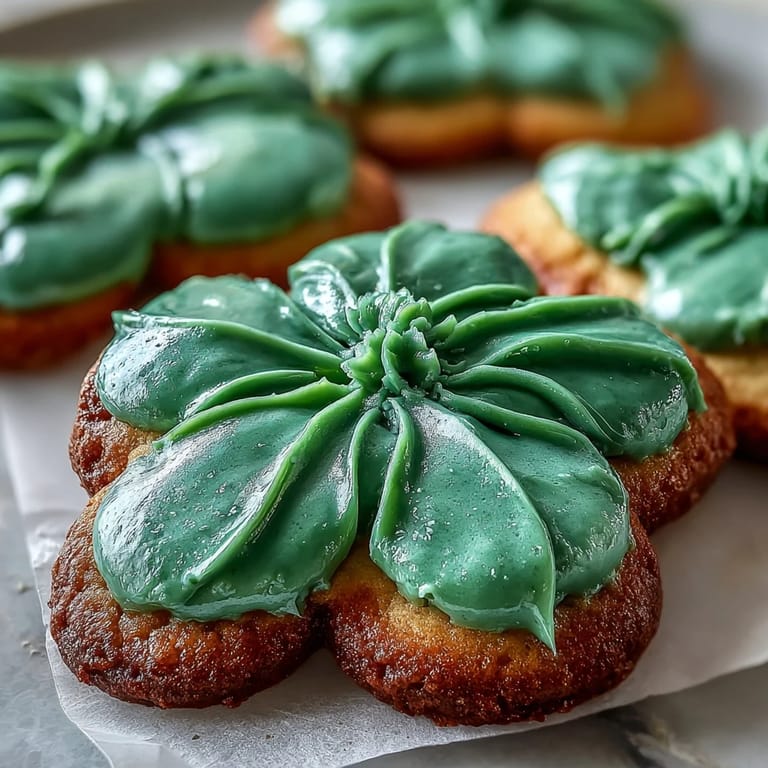
- Transfer icing to piping bags fitted with small round tips, then outline your cooled cookies and flood the centers with icing. Add sprinkles or edible glitter if you like, then let everything set for at least 1 hour before serving or packaging.
 Save
Save There was a moment two years ago when my mom opened the box of shamrock cookies I'd shipped her for St. Patrick's Day, and she called me immediately just to say they were beautiful. It wasn't about the taste (though they were delicious), it was that these little green shamrocks meant I'd thought of her, that I'd spent time creating something special for her to enjoy.
Why Royal Icing Matters More Than You Think
The real transformation happens when that glossy icing sets. It creates a protective shell that keeps cookies fresh longer and gives them a bakery-quality finish that makes people actually believe you're a professional decorator. I've learned that smooth, shiny icing is partly about technique and partly about patience—rushing it leads to dull, cracked surfaces, but waiting it out gives you that satisfying glossy shine.
Storage That Keeps Them Fresh
Once the icing is completely set, store these cookies in an airtight container with parchment paper between layers so they don't stick together. They stay fresh for up to a week, and honestly, I've found that they taste even better on day three when all the flavors have had time to settle and mellow.
Make-Ahead Magic and Variations
The beauty of this recipe is that almost every step can be done ahead. You can bake the cookies days in advance and store them unfrosted, or make the royal icing up to two days beforehand and simply stir before using. If you're feeling adventurous, swap the almond extract for lemon zest, or add a tiny pinch of food-grade glitter to the icing for extra sparkle.
- Mix royal icing ahead and keep it covered at room temperature; it stays perfect for up to two days.
- Unfrosted baked cookies keep in an airtight container for up to five days, so bake early in the week and decorate when you have time.
- This dough freezes beautifully either as disks or as cut-out cookie shapes, so you can have fresh shamrocks ready whenever the craving strikes.
 Save
Save These shamrock cookies have become my St. Patrick's Day tradition, the thing people actually look forward to more than the green beer. There's something about handing someone a cookie you've decorated yourself that feels more meaningful than anything store-bought ever could.
Recipe FAQs
- → How do I achieve the perfect buttery texture?
Use softened unsalted butter and cream it well with sugar until light and fluffy. Avoid over-mixing once the flour is added to keep the texture tender.
- → What is the best way to prevent cookies from spreading during baking?
Chill the dough thoroughly before rolling and cutting shapes. This helps maintain the cookie form and prevents excessive spreading.
- → How should royal icing be prepared for decorating?
Beat powdered sugar with egg whites or meringue powder and a touch of vanilla or lemon juice until stiff, glossy peaks form. Tint with gel color as desired and use piping bags for detailed decoration.
- → Can I prepare the royal icing ahead of time?
Yes, royal icing can be stored covered at room temperature for up to two days. Stir before use to restore consistency.
- → Are there allergen-friendly substitutions for this cookie?
For vegan alternatives, use a flax egg and a vegan-friendly version of royal icing. Omit almond extract to avoid tree nut allergens.